For all those who use configuration tables via SM30 (remember, this is not Cloud Compliant, since you access the SAP backend directly via the GUI, which is no longer available in the Cloud), and who are wondering what the solution is on Fiori, here it is: Custom Business Configurations.
Here’s how to use this Fiori application to add our custom configuration tables.
Please note: for the Standard configuration provided by SAP, please follow the instructions in the documentation.
1. Creating a database table
The first thing to do is to create the database table. This must be of type “C” (Customizing) to be configured via the Fiori Custom Business Configuration application. As with the classic SM30, this means that the tables must be created in DEV, then included in a Transport Order (TO) and transported to the production system.
But we all know that there are sometimes configuration requirements that need to be different between DEV and PROD, and yet we don’t want to create an “A” type table (Application table) because we’re still dealing with configuration. Don’t worry, we’ll also look at how to make a table non-transportable and modifiable in prod via the Fiori Custom Business Configuration application.
Here we create a very simple customization table to store error messages and their associated descriptions.
@EndUserText.label : 'Error code test'
@AbapCatalog.enhancement.category : #NOT_EXTENSIBLE
@AbapCatalog.tableCategory : #TRANSPARENT
@AbapCatalog.deliveryClass : #C
@AbapCatalog.dataMaintenance : #ALLOWED
define table zcode_test {

  key client : abap.clnt not null;
  key code : abap.char(3) not null;
  description : abap.char(40);
  last_changed_at       : abp_lastchange_tstmpl;
  local_last_changed_at : abp_locinst_lastchange_tstmpl;
}
The annotation “@AbapCatalog.dataMaintenance : #ALLOWED” indicates that modifications to the table are authorized.
Similarly, the following fields are mandatory for Business Configuration Object management:
- last_changed_at : abp_lastchange_tstmpl;
- local_last_changed_at : abp_locinst_lastchange_tstmpl;
2. Business Object generation
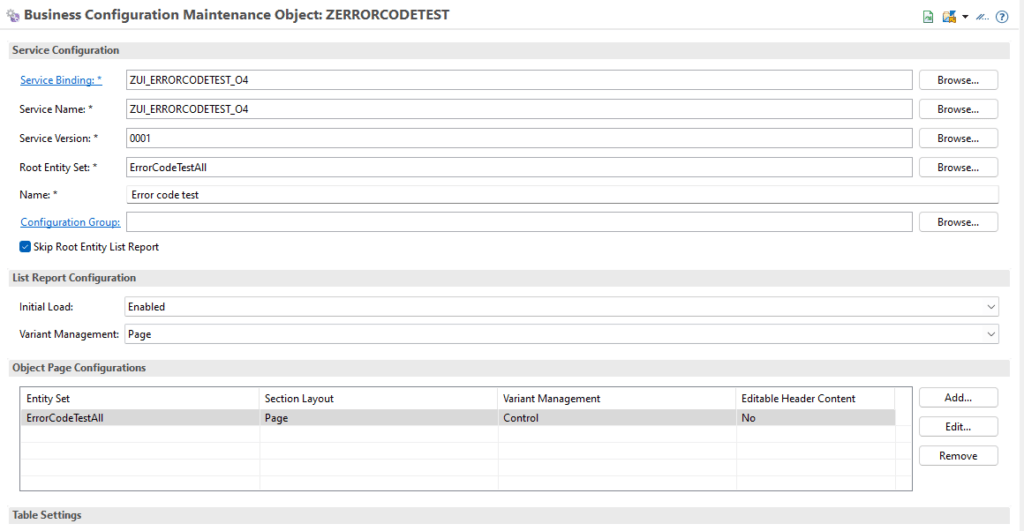
Once the table has been created, we can use the tools provided by SAP to automatically create all the objects needed to add the table to the Custom Business Configuration application (a RAP object and its associated Maintenance Object).
To do this : Navigate to Generate ABAP Repository Objects… -> Maintenance Object by right-clicking on the table.


All the necessary objects will be created:
- Les objets liés au Business Object crée


Note that here we’re using an S/4 Hana Cloud system, Private Edition for this demo. You’ll need to add the necessary authorization objects for users to access the configuration table via PFCG (same for On-Premise).

For S/4 Hana Cloud, Public Edition and BTP systems, ABAP Environment, as authorization systems have evolved, it will be necessary to create an IAM application, assign it to a Business Catalog and finally to a Business Role which will be given to the desired users.
Documentation :
– S/4 Hana Cloud, Public Edition: https://help.sap.com/docs/SAP_S4HANA_CLOUD/6aa39f1ac05441e5a23f484f31e477e7/5b6290112008456b9e9400faebb8cd33.html
– BTP, ABAP Environment: https://help.sap.com/docs/btp/sap-business-technology-platform/identity-and-access-management-iam
- The Maintenance Object created (linked to the BO created previously)

Sur S/4 Hana, On-Premise et S/4 Hana, Private Cloud Edition, il faudra activer le service en /n/IWFND/V4_ADMIN ( C’est un service OData V4 qui est généré).

3. Access the configuration table
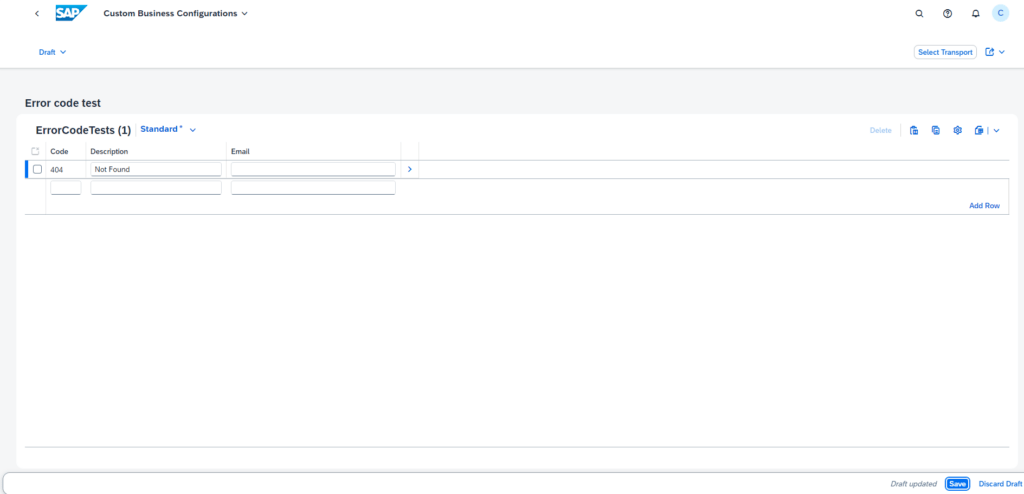
- Launch Custom Business Configuration

- Go to table


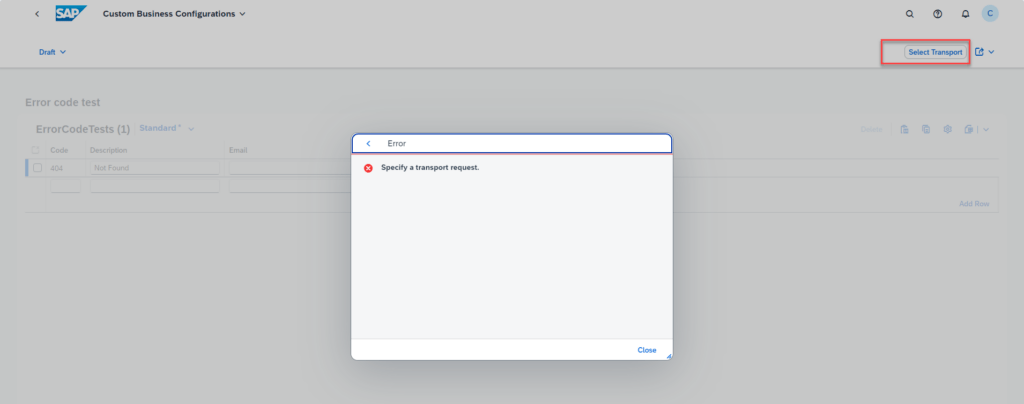
If we don’t give a Transport Order (TO), then we have a save error.

4. Disable transports
Here, we’d like the configured email to be different in DEV, in order to use the developer’s email for certain tests.
During automatic object generation, a transport object (also visible in SOBJ for On-Premise and Private Cloud Edition systems) is created.

We can see that it’s these properties of the transport object that prevent the creation without a transport order (and the non-changeability of our table in production). In fact, these properties are verified in the business object we’ve just created.
To remove this automatic management via transport, we need to take a closer look at the automatically generated behavior definition.
We can see that the class that retrieves information from the transport object is the following: LHC_RAP_TDAT_CTS through its (only) GET method, which is called in other methods of the behavior definition to perform checks.

We’ll be commenting on the GET_INSTANCE_FEATURE and GET_GLOBAL_FEATURES methods ( as seen in this article ), which allow us to authorize, or not, the modification of our customizing table according to the properties of our Transport Object (typically, in production this would be refused if not commented out), obtained thanks to the GET method call seen above.
We also comment on a method that implements a VALIDATION of the transport request: VALIDATETRANSPORTREQUEST


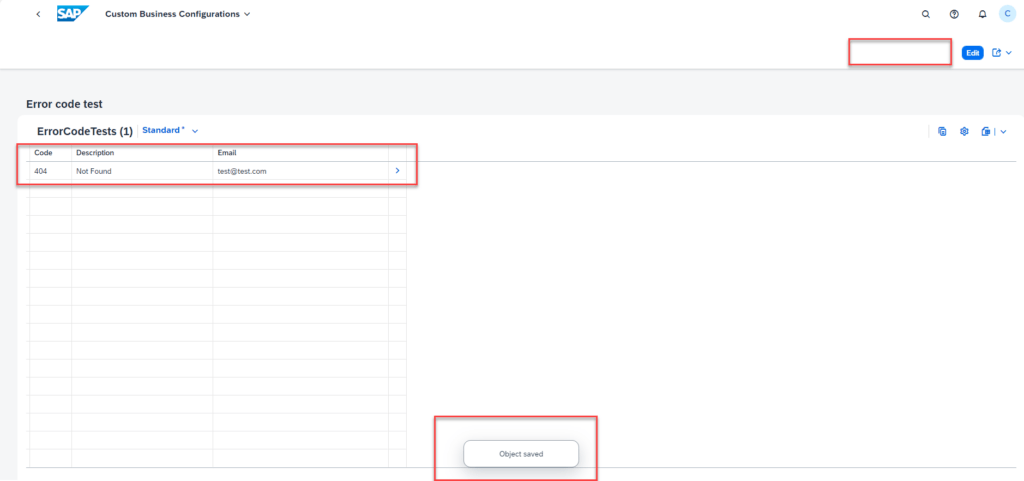
Finally, as this is a RAP object, some annotations have been generated, including those required to display the “Select Transport” button when accessing our table.
We can remove this button from the Metadata Extensions CDS as it is no longer needed.

So we can now create and modify entries directly in our system without an OT.

Note: We could also add our own validations/determinations to the generated RAP object.
Conclusion
So now you know how to replace your access to the SM30 to configure your customizing tables in a Cloud Compliant way.
